


Shelving Assembly Instructions: Dixie Shelving Company
Shelving assembly instructions for both widespan shelving and industrial steel shelving are provided to help you best benefit from your Dixie Shelving products on our national shelving company website. On this page, you have the opportunity to view the shelving instructions for industrial steel shelving.
We hope you will find the following Dixie Shelving information helpful for meeting your needs. For additional assistance or to receive information about any of our steel shelving products, please call (713) 957-1111 today to experience friendly, prompt assistance from the U.S. shelving leader, Dixie Shelving.
Thank you for visiting our website and we look forward to continuing to meet all of your steel shelving needs in Texas, Louisiana, Oklahoma and surrounding states!
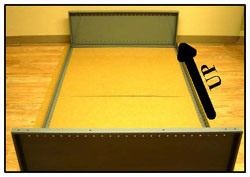 |
STEP 1 Bolt top shelf to SIDES of posts in top round hole (round and square holes are on SIDES of posts). Bolt bottom shelf the same way using 1st, 2nd, or no higher than 3rd hole from bottom of post. Repeat bolting process with 3rd and 4th post. Tighten all 8 bolts securely. |
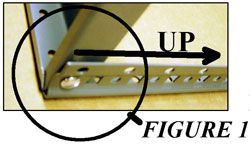 |
Figure 1 shows the correct location of the 1/4" x 5/8" Truss Head bolts. The bolts for the top and bottom shelf use the round holes between the square holes. The clips are used to fit the middle shelves. Fit the clips into the square holes in the posts. |
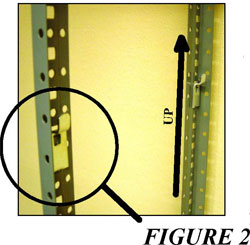 |
STEP 2 Counting the holes from the bottom or top will insure the clips are all at the same level for the shelf to sit properly. Install clips with the "L" shaped finger in the up position. (figure 2) Holding one end of shelf higher place the shelf between the posts into position over desired level of clips. Push each corner of shelf firmly onto clip. |
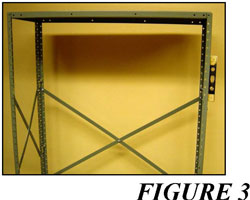 |
STEP 3 If installed correctly the overlap of braces will show the location for a 1/4" bolt to secure brace (figure 4). Level unit and securely tighten all bolts. |
 |
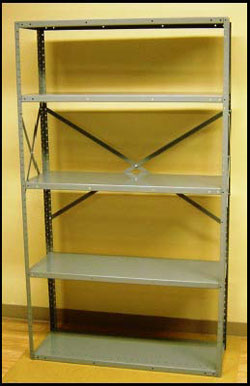 |
Middle shelves are easily adjusted by resetting the clips to a new level. Your new DIXIE shelves will give many years of service! THANK YOU FOR CHOOSING DIXIE PRODUCTS
FIGURE 5 ( complete unit) |